Rics mom Mar 01, 2016
Intro to Photography Class
Better known as Reddit Photoclass
25 – Layers and Masks
Along with levels and curves, layers and masks are some of the most important concepts in image editing. They hold the key to two crucial features: localized adjustments and non-destructive editing.
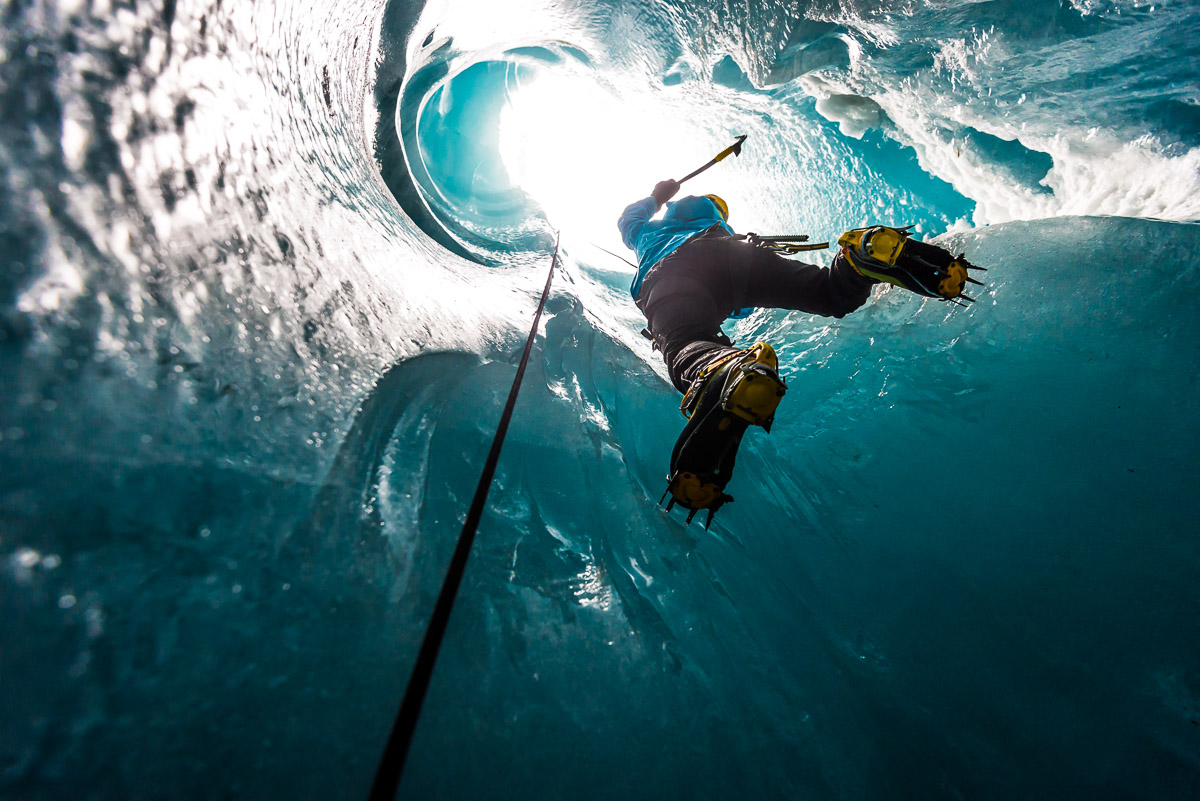
Giulia Monego climbing out of a moulin crevasse in Mer de Glace, Chamonix.
Layers and masks are a fairly simple idea. Imagine the following situation: you have adjusted the histogram so that it touches the edges perfectly, but you still aren’t satisfied: the mountain in the background looks too dark. However, your hands are tied, as the bright sky is just perfect. If you increase brightness even a little bit, it will go into pure white. What you need is a way to modify only part of the image.
Now imagine that you print your original image. You then use the levels tool and increase brightness so that the mountains are just right, burning the sky in the process. You make another print of this new version.
Now comes the trick: you position the new print above the old one. Then you take a pair of scissors and cut out the sky in the new image, uncovering the bottom image. Finally, paste the top print (minus sky) on top of the bottom one: your new image now has correct exposure everywhere.
Of course, it would be extremely cumbersome to do this with physical prints, but this is exactly what is going on when you use layers in photoshop: you have duplicated the bottom layer (made a print copy), modified the top layer with the levels tool then applied a mask (cut out with scissors) and finally merged the two layers (glued them together).
Things are actually even better than that. Scissors are a pretty limited tool, they only create two states, cut out or left in, and there is a sharp delimitation between the two. Layer masks, on the other hand, can have soft (feathered) transitions and semi-transparency, showing part of each layer.
The way it works is that a mask is a greyscale image. White represents showing all of the layer, while black shows none. So a layer with a pure white mask shows entirely, while a pure black mask acts as if the layer didn’t exist at all. 50% grey would show half of the top layer and half of the bottom one, etc.
Whenever you create a new mask for a layer, you always start with pure white. You can then paint over the mask with a grey or black brush, revealing more and more of the bottom layers. If you use a hard brush, there will be sharp transitions, while soft brushes will tend to produce more natural looking results.
Creating a mask can be a very time consuming task, but attention to details will be crucial if you want your editing to not be obvious.
So far, the layers we have used have been bitmap layers: each layer is a full size image. There is however another type, called adjustment layer (note that this is one of the big lacks of Gimp compared to Photoshop). They work by simply storing what transformation should be applied on the layers below. For instance, instead of duplicating the bottom layer and applying levels, the software will simply remember “move the white point 20 steps to the left and the black slider 15 points to the left”.
This has two significant advantages. First, it dramatically reduces the file size (and thus the responsiveness of the application) since you don’t have to store a full size image for each layer. Second and more important, it allows you to change the adjustment at any point. If after making many other modifications you suddenly decide that you would rather have the black slider 10 points to the left instead of 15, you can change this easily instead of having to start from scratch again. This also means that you can work entirely non-destructively if you use only adjustment layers. To recover the initial image before any editing, simply hide all layers but the bottom one.
For both reasons, you should take the good habit of always using adjustment layers for all your work.
4 Comments
-
-
ktiyyw
-
6czyh0
same;)