Ana Dec 03, 2024
Intro to Photography Class
Better known as Reddit Photoclass
08 – Aperture
The time has come to talk about one of the scariest subjects of photography: aperture and f-stops. This is the second exposure control (with shutter speed and ISO) and perhaps the least intuitive.
Remember our pipe and bucket analogy in the exposure lesson? Aperture corresponds to the diameter of the pipe, which is a straightforward way of controling the amount of water which ends up in the bucket: the smaller the aperture, the less water we get. This is exactly what goes on inside your lens, there is a diaphragm whose open area (in other words, its aperture) can vary, from fully open to almost entirely shut. Controling the aperture is also what your eyes do to adapt to different light conditions: enter a dark room and your pupils will expand to get as much light as possible, or step outside in full sunlight and you will need a few moments for your pupils to shrink enough so that you don’t get blinded.
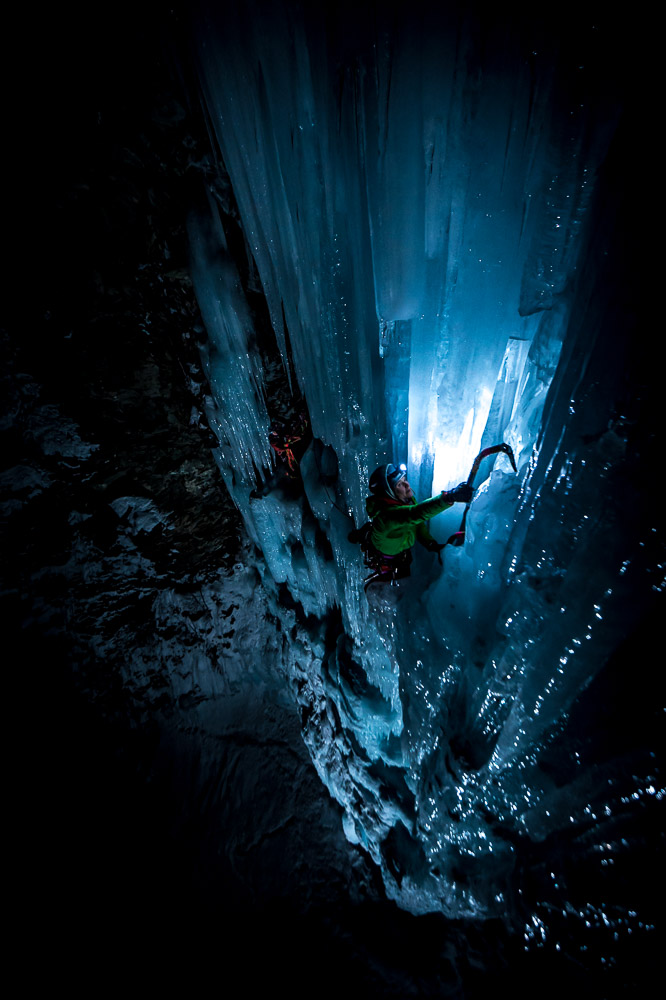
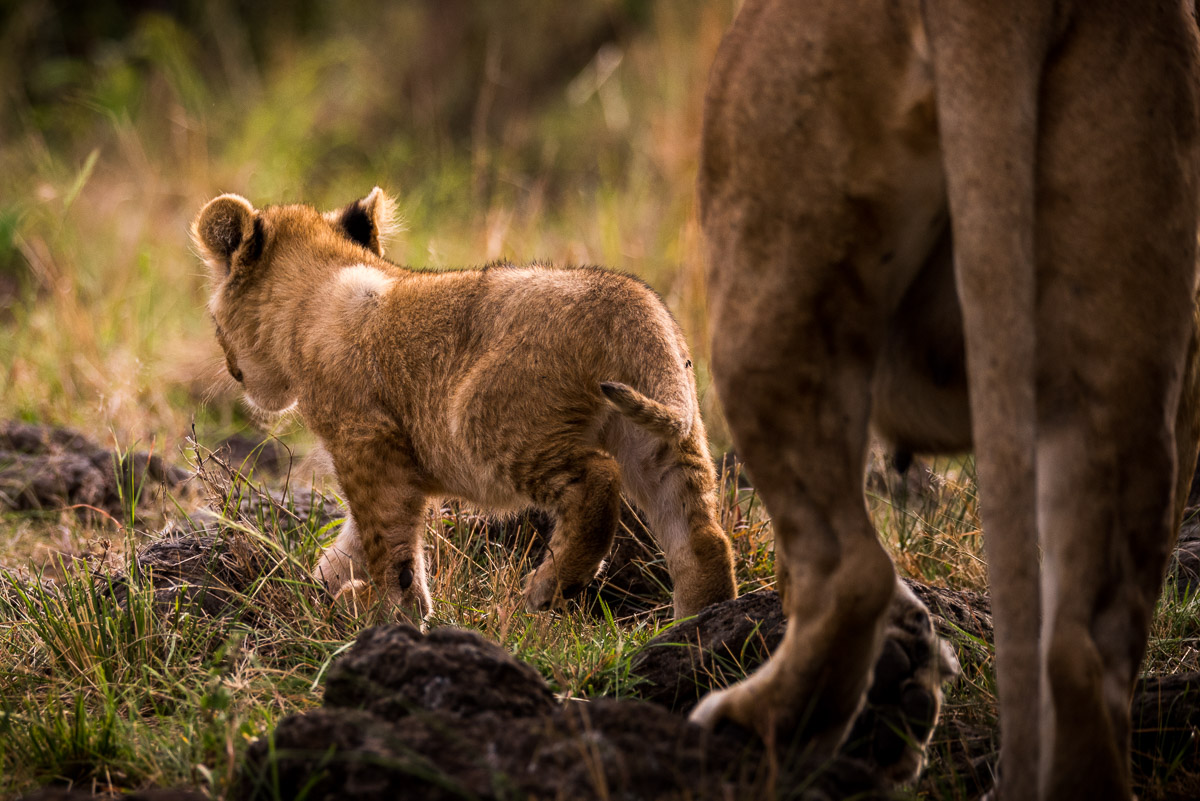
However, just like shutter speed, modifying the aperture has other consequences than changing exposure. It also modifies depth of field. This is how we call the distance between the nearest object in focus and the furthest in focus, or in other words, how deep the area of focus is. We will discuss it in more details in another lesson, as there are (as always) other factors which affect it. For now, we can just remember that large apertures, which mean a lot of light is hitting the sensor, will create shallow depth of field, where the subject is in focus but the background appears blurred. Conversely, small apertures, limiting the quantity of light we record, will create large depth of field, where much of the image is in focus. Neither is intrinsically good or bad, it all depends on what you are trying to communicate with your image. Here are examples with shallow depth of field:
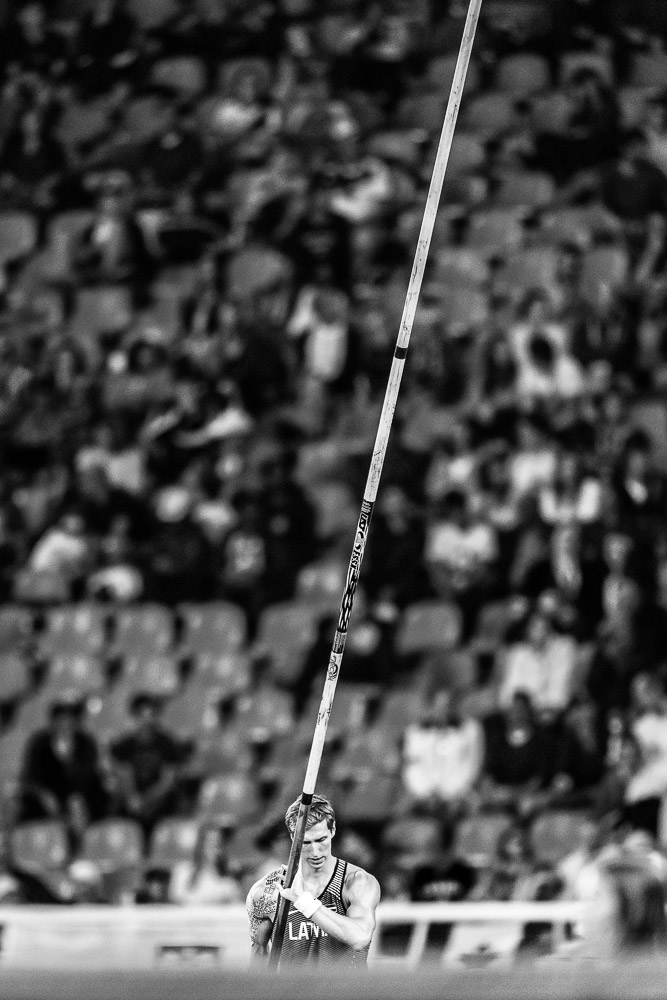
and large depth of field:
A large part of the confusion linked to aperture comes from the user very-unfriendly notation for aperture: the infamous f-stops. It is a dimensionless number obtained by black magic (actually not, but the real explanation is more confusing than helpful) but what it boils down to is: the smaller the number after the f, the larger the aperture: more light, less depth of field. This is why we care about the maximal aperture of a lens, which is the lowest f-number we can get. Of course, the higher the number, the smaller the aperture: less light, more depth of field.
It gets worse. Remember how in the last lesson, we defined a stop of exposure to be the doubling of the amount of light which reaches the sensor? It was easy with shutter speeds because we could just double the speed. However, to get one more stop with aperture, you shouldn’t multiply by 2 but divide by 1.414 (square root of 2). Since no one actually calculates that, photographers remember instead the usual sequence of f-numbers: f/1, f/1.4, f/2, f/2.8, f/4, f/5.6, f/8, f/11, f/16, f/22 (and sometimes f/32, f/45, f/64). You don’t have to learn these numbers by heart, but it is helpful to know which number comes before and after each other: to know that if you are shooting at f/4 and want one less stop of exposure, you should go to f/5.6, etc. Thankfully, if you start paying attention to your aperture, you will start remembering them very quickly, as they always stay the same.
But wait, it’s not quite over yet. There is another important factor you should take into account when you are choosing your aperture. If you shoot outdoors, you will often find yourself in a situation where you want depth of field to be as large as possible and you have more than enough light to use any aperture you want (this means that the corresponding ISO and shutter speed to obtain a good exposure will both be within acceptable boundaries). According to what we just talked about, your natural reaction would be to close aperture as much as possible, using something like f/22.
That would be a bad idea. The reason is called diffraction, an optical phenomenon which becomes noticeable as light is forced to go through an increasingly narrow aperture. What this means concretely is that your image will be less and less sharp as you close your aperture. This is usually noticeable only from f/11 or so, however. Most lenses also have to make optical compromises to obtain larger apertures, so won’t be quite perfectly sharp when fully open (low f/stops).
The consequence is that each lens has a sweet spot, an optimal aperture at which its sharpness is optimal. The further you step away from this aperture, the worse the results will be. Depending on the general quality of the lens, it could be hardly noticeable, or it could ruin your images. The exact value of the sweet spot depends on each particular lens, but for DSLR equipment, it is usually around f/8, which makes this a good default aperture (hence the old saying “f/8 and be there”).
Assignment
Today’s assignment will be pretty short. The idea is simply to play with aperture and see how it impacts depth of field and the effects of diffraction. Put your camera in aperture priority (if you have such a mode), then find a good subject: it should be clearly separated from its background and neither too close nor too far away from you, something like 2-5m away from you and at least 10m away from the background. Take pictures of it at all the apertures you can find, taking notice of how the shutter speed is compensating for these changes. Make sure you are always focusing on the subject and never on the background.
Back on your computer, see how depth of field changes with aperture. Also compare sharpness of an image at f/8 and one at f/22 (or whatever your smallest aperture was): zoomed in at 100%, the latter should be noticeably less sharp in the focused area.
8 Comments
-
-
8bjzk8
-
8pwn4a
-
og9z7d
-
l5ryut
-
kit4ps
-
n00yz3
-
8gj1oq
I made a collage of widest (f/2.8) vs. set+forget (f/8) vs. smallest (f/22) apertures that are zoomed in to some points of interest here:
https://www.flickr.com/photos/201761329@N04/54180064648/in/dateposted-public/
Notes on Results:
– The door hinge in the background is blurry at f/2.8, clear at f/22, and has slight blur at f/8 where additional details don’t detract from the main subject (flowers)
– Main flower in foreground has sharpest clarity at f/2.8, not very noticeable decrease at f/8, and quite noticeable decrease in clarity at f/22 (especially in RAW file format)
– White flowers in mid/foreground are clearest at f/2.8 and reduce in clarity as aperture decreases (f/# increases)